Creating your own formulas is an important step you can take to better analyse the data in your Workday Adaptive Planning model. In this article we show you how to create custom accounts and formulas.
Watch QMetrix Senior Consultant Troy Bauer’s presentation or read the notes below. Or, click play and scroll down so you can watch and read at the same time.
If you have experience with building Web Reports, it’s likely you’ve created your own formulas using the Custom Calculation element:
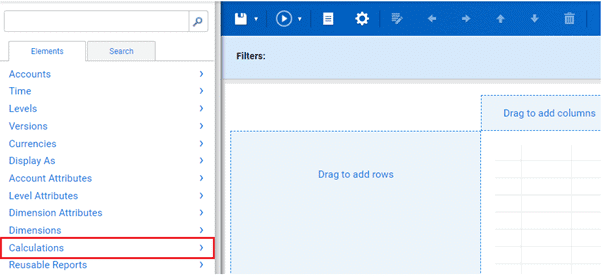
Whilst this is a quick and easy method of bringing bespoke calculations into your reports, it comes with limitations. This article will discuss an alternative method: storing formulas in Custom Accounts. This has the following advantages:
- Reusability: Define the formula once in the Custom Accounts area, and reuse it in any report, sheet or dashboard without redefining the formula. This is a more efficient and consistent representation of the output.
- Transparency: Use Explore Cell on your custom account to investigate the components of your formula and how they evaluate.
How to create a Custom Account in Workday Adaptive Planning
The following example will walk you through creating a custom account for Gross Margin (Revenue less Cost of Goods Sold).
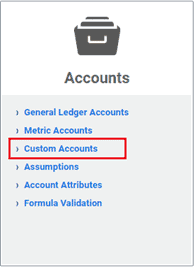
- Navigate to Modeling > Accounts > Custom Accounts:

- From the toolbar click Create New Account:

- From the settings on the right, assign it a Name and Code that describes the account. To provide further context, use the Description field:

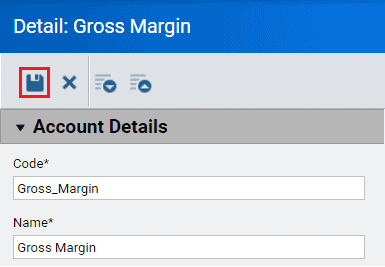
- Click Save:


How to assign a Master Formula to an account
When it comes to assigning formulas to a custom account, there are multiple methods and customisations available to us. This article will outline the simplest method of a Master Formula. This is defined in the account’s settings and applies to all versions and all levels. Follow these steps to add a Master Formula:
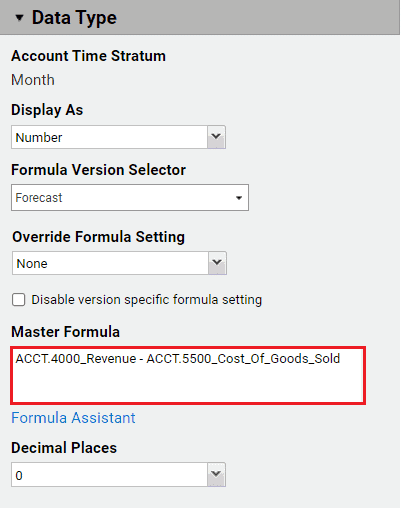
- Click on the account and observe its settings on the right. Scroll down to Data Type > Master Formula:

- Click on Formula Assistant:

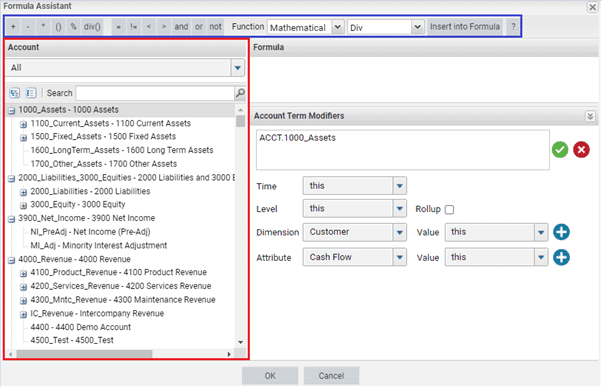
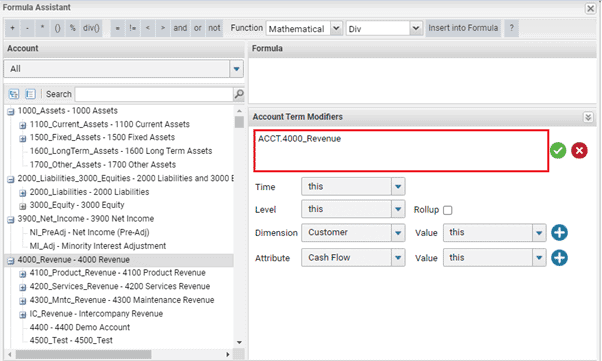
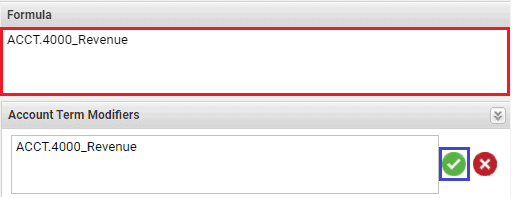
The Formula Assistant window provides an intuitive, drag-and-drop approach to building formulas. The accounts you have available to reference appear in the left pane (outlined in red) and commonly used functions are available in the top pane (outlined in blue). - To add account(s) to your formula, select it from the list. It will then appear in the Account Term Modifiers window:

- Add it to the formula window by clicking on the green tick:

- Finish off the formula for Gross Margin accordingly. Note that you can type a minus sign directly into the formula window:

Whilst this formula is quite simple, you can investigate more complex functions by using the pane at the top. Information on each of them can be found by clicking on the question mark:
- Click OK at the bottom of the Formula Assistant window. This action will validate the formula for you, ensuring no syntax errors are present. Assuming the formula is correctly stated, it will appear in the Master Formula window:

- Then Save the account:

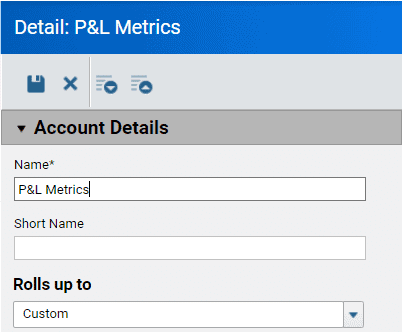
- Your Gross Margin account has now been created. As you create more customs accounts for different purposes, it’s a good idea to Group them accordingly. See below for examples:

- Click on the Create New Group button from the toolbar to do this.


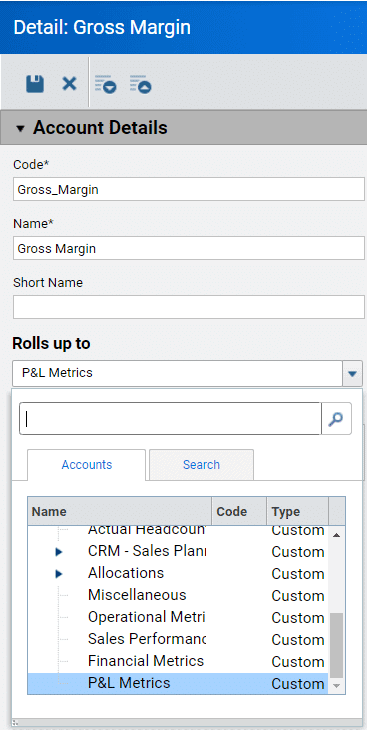
- Add the account to your new group by adjusting the account’s Rolls Up To setting:

- Your account is now grouped in a logical fashion:

Now that our account has been created, we can reference it in any Web Report, OfficeConnect Report or Dashboard. In Web Reports for example, you’ll find it in the Elements pane under Accounts>Custom:
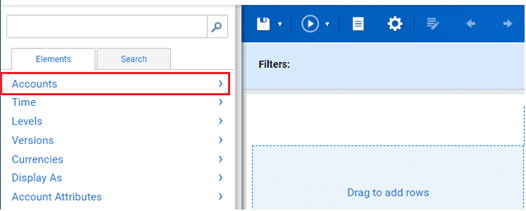
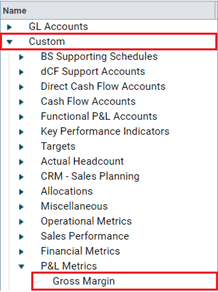
The key advantage to this is that, unlike Custom Calculations, the formula does not need to be redefined when bringing it into the report (it was already defined in the Master Formula!). This makes for a more efficient and consistent reporting output.
What’s more, when viewing the account on the report, you can investigate its components by clicking on the value:
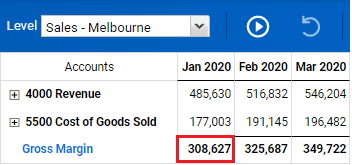
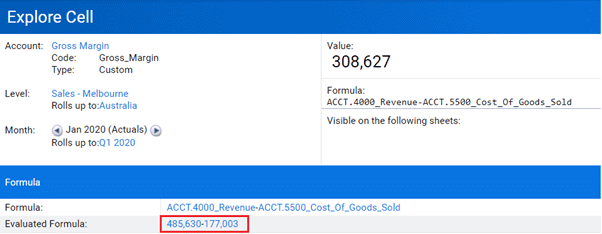
This opens the Explore Cell window. Use the Evaluated Formula section at the bottom to dig deeper into the formula’s components. This can be very useful when troubleshooting unexpected output:
Further Reading on Accounts and Formulas
Note that there are more customisations available when it comes to Custom Accounts and formula writing. These can deliver even more flexibility in your reporting and analysis. Check out the related articles below:
Looking for more Workday Adaptive Planning / Adaptive Insights best practice tips?
