
Workday Adaptive Planning’s OfficeConnect is widely used for reporting. As an add-on for Excel, it allows users to build a report utilising OfficeConnect properties and features, as well as make use of familiar Excel functionality.
Jump to:
- Workbook Properties in OfficeConnect
- Applying elements in OfficeConnect
- Copy and paste
- Find and Replace in OfficeConnect
- Health Check for Workday Adaptive Planning
- More Resources
As part of the Workday Adaptive Planning User Group for QMetrix’s Premium Care clients, Consultant Ted Ma demonstrated how to build reports in OfficeConnect. He also addressed issues commonly raised so you can avoid them and use the reporting function more effectively such as:
- Workbook properties – issues with reports dates and settings override
- Applying elements to OfficeConnect reports
- Copy and paste in OfficeConnect
- Find and replace in OfficeConnect
All these topics are covered in the write-up below. You can also watch the video for a demonstration of the first two topics.
Workbook Properties in OfficeConnect
One of the most prominent features in an Office-Connect report is the Report Date, which is located in the Workbook Properties. When “Make new elements relative to the report date” is enabled, the date set in the report date property will drive the periods in the report. In the screenshot below, November 2022 has been selected.

This means when we add November into the report, it will represent the current month. The following month, if we were to change the report date to be December 2022, upon a refresh the period in the report would now display December. This is because the period is relative to the report date.
Setting the report date up correctly at the beginning of a report build is important so that maintenance and updates are a seamless process. However sometimes we are required to modify pre-built reports that may not have been optimally setup.
Following are some tips we suggest when modifying an existing report;
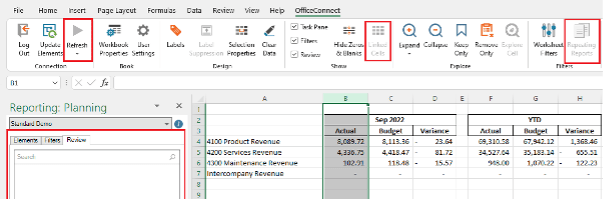
- Note that the periods displayed in the report and the report date set in Workbook properties are inconsistent. We want to align these two dates so that periods in the report are driven by the report date.

- Highlight the columns that are referencing September 2022. From the Review tab on the right-hand side of the screen, select ‘Switch to Absolute.’

This will make column B a static value of September 2022 (It will not update according to the report date). You will need to update each column individually.
- Now all our periods are displaying September 2022, we want to go into the Workbook Properties and change the report date to be the last date in September 2022.

- Once we have updated the report date to be September, we want to revert all the periods back to relative, so that they can be driven by the report date. To do this, repeat step 2 but instead of selecting Switch to Absolute, select Switch to Relative.


- Now for monthly maintenance, you can change the report date to reflect the month you want to report on.
Applying elements in OfficeConnect
There are diverse ways to apply elements to the rows and columns in an Office-Connect report. We often get asked the question “…Which way is best?.” There is no right way or wrong way, nor is there a better way of doing so. It comes down to finding the best method to suit your reporting requirements.
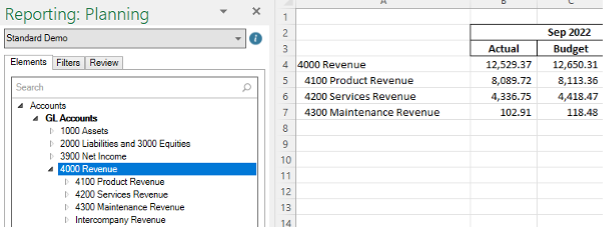
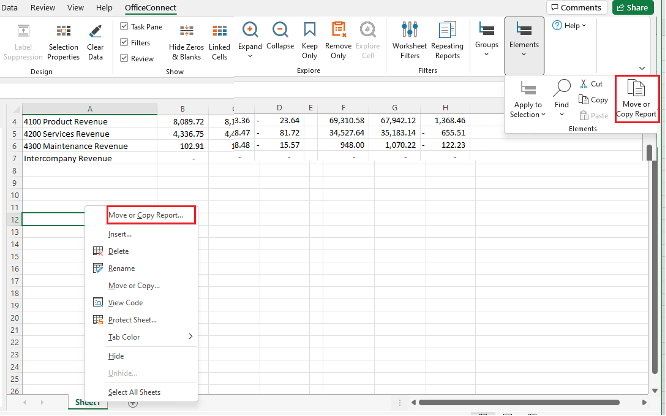
Let us look at the options of applying Accounts to rows. In addition to the drag and drop method, Right-clicking on a parent account brings up a list of options which all provide different ways of applying elements.

Apply to selection
This will just apply the account selected to the row. In the screenshot above, 4000 Revenue would be applied.
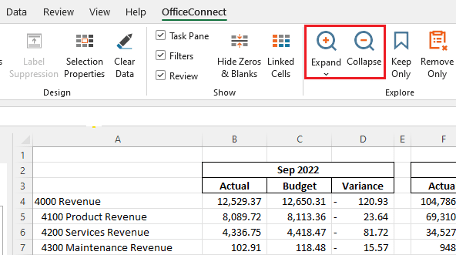
Apply and Expand
Apply and Expand will drop the account selected along with its immediate children into the rows. It will look something like this:
Using the apply and expand also enables you to use the OfficeConnect ribbon features to Expand and Collapse. You can select the row the account belongs in and either expand that account further to expose the children accounts or collapse to roll back up to the parent account.
We always suggest a word of warning when using the expand and collapse features within Office-Connect. Some of these warnings include:
- Expanding and collapsing rows and columns can cause issues when using cell calculations. When using this feature, ensure that the cell calculation is retrieving the correct information.
- The expand and collapse feature does not work in conjunction with the grouping feature. If accounts have been grouped, the group will need to be broken to allow accounts to expand.
- If you have typed in comments into the cells that intersect with a row that has been expanded, the comments will be removed upon a refresh. If you are typing comments in an OfficeConnect report it is not suggested to use the Apply and Expand methods of applying elements. Instead, use one of the grouping options discussed next.

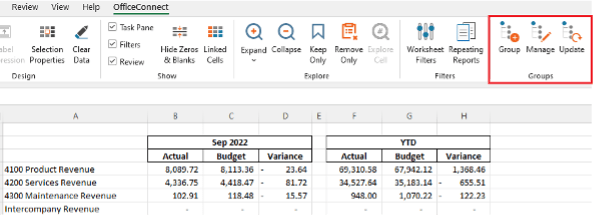
Apply immediate children as group
‘Apply immediate children as group’ will group the children of the account selected and apply these to the report. The benefit of using this method is that if a new child account is added in the model, a name is changed, or an account is removed, after a refresh the report will reflect these changes.
Accounts can be manually grouped or existing groups can be modified through the Group and Manage properties on the OfficeConnect ribbon.
Apply selection as group
Apply selection as group behaves similarly as apply immediate children as group except allows you to group specific accounts together, rather than all children accounts.
User Settings vs Workbook Properties
A common point of confusion for a lot of our customers is the difference between User Settings and Workbook Properties. We often get users who have changed a property in User Settings that seems to not be working. Often, this is because the same property has also been set under Workbook Properties. It is important to remember that Workbook Properties will override User Settings. 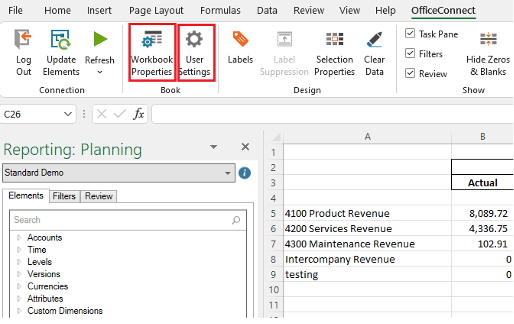
Copy and paste
Copying and pasting elements and sheets in OfficeConnect is different to copying and pasting in Excel.
When using the excel copy and paste functions or the keyboard short cuts only the text elements are retrieved. This means that the underlying adaptive elements are not copied and is therefore no longer tied back to Adaptive. From an end users’ perspective, this will mean that the data and values will not update via a refresh and the Office-Connect functions will be disabled. For example:
Instead, if you need to copy and paste, ensure you use one of the two OfficeConnect features as highlighted below:
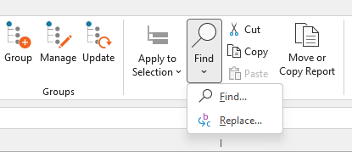
Find and Replace in OfficeConnect
Another notable feature in OfficeConnect is find and replace. This allows you to replace any existing elements in the report with a different element or remove it entirely.
For example, you have a requirement to change the version in your report. By selecting the Find and Replace.
A pop-up window will appear that allows you to find the existing element you want replaced (Left) and select a new element.
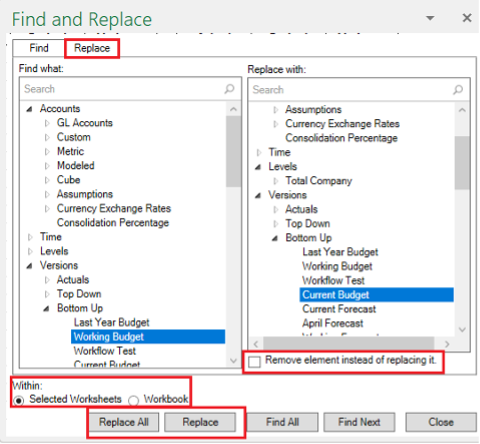
In the screenshot above we are replacing Working Budget with Current Budget. Note there are additional options which can be selected, such as remove element instead of replacing it, and also options which allow you to control whether the element is being replaced throughout the entire workbook or just the selected worksheet.
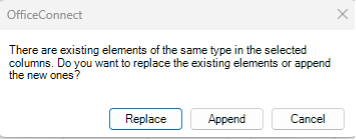
Alternatively, if there is just one occurrence of an element that needs to be replace, you can drag and drop on top of the existing element and select Replace. Note append will add the existing element with the new element.
Get more Workday Adaptive Planning tips here